How to Build Rotator Cuff Strength for Strong and Pain-Free Shoulders
I was fresh out of undergrad.
Sitting down for my final interview as a trainer at a high-end health club. Before me was the big boss over all the trainers in the area. A proud fellow, squeezed into a very small shirt, ready to grill me with questions.
The only question I remember was the one I fumbled big time.
He asked me, “Name the rotator cuff muscles and tell me their actions.”
But my mind was blank. I knew they were shoulder muscles, but that was about as far as I got with the question.
With a smug grin, he listed the four muscles and told me their actions, and said: “How would you know how to build rotator cuff strength?” One day later, I got an email that specifically read…
we chose someone else
But as fate would have it, not getting that job put me on a different path, which over 10 years later I now educate people about their shoulders (and talk a ton about rotator cuffs.)
So as my redemption, let me share with you…
Everything you need to know about the rotator cuff (and how to build rotator cuff strength.)
What the Text Book Tells You
Let’s start with the basics. It’s NOT called the rotator CUP, nor the ROTARY cuff. I hear these two mistakes all the time.
It’s called the ROTATOR CUFF.
Formed by four muscles that attach around the ball of the shoulder.
Supraspinatus
Infraspinatus
Teres Minor
Sub Scapularis
The acronym S.I.T.S. will help you remember them for that day they come up in a job interview.
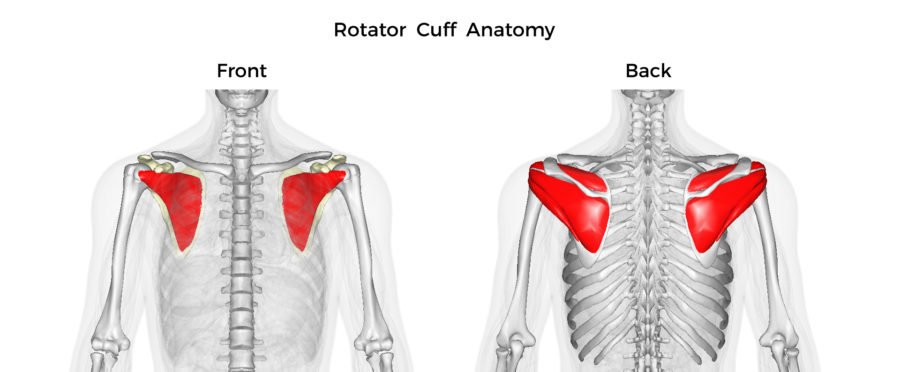
The SITS Muscles
If you’re into this stuff, you can dive into each muscle below. If you could care less to know the actions, just skip on over The SITS Muscles, the important stuff comes after (and we’ll show you how to build rotator cuff strength.)
Supraspinatus

From the picture, you’ll see how the supraspinatus sits over the top of the arm bone.
Lift your arm away from your body. Your supraspinatus was the
main muscle that made that happen.
Keep raising your arm to shoulder height, and the deltoid (the big shoulder muscle) does more moving, but the supraspinatus keeps helping out.
The supraspinatus is a small muscle but it can be a huge problem. If you’ve ever had pain lifting your arm, there’s a good bet you’ve pissed off your supraspinatus. And you’ll quickly realize that this pain is a huge limiter when it comes to arm strength and range of motion.
Infraspinatus

The infraspinatus is on the back side of the shoulder. It’s known as the primary external rotator of the shoulder.
External shoulder rotation includes:
- With your elbow at your side, rotate your palm so it faces forward.
- Now, bend your elbow so your hand is in front, and rotate it outwards.
- Now, reach a hand back behind you like you’re going to throw a ball.
Teres Minor

The teres minor is the little brother to the infraspinatus. It’s so tightly connected with the infraspinatus, that muscles will often fuse together.
It helps out with external rotation of the shoulder, but not as much as the infraspinatus.
Although it does become more important as an external rotator as the arm gets above the head (with your arms overhead, point your thumbs back).
Subscapularis

The last of the SITS muscles is the subscapularis. It’s the largest of the four rotator cuff muscles and is the internal rotator of the shoulder.
Internal shoulder rotation includes:
- With your elbow at your side, rotate your palm inwards so it faces backward.
- Now, bend your elbow so your hand is in front, and rotate it into your body.
- Now, pretend like you are throwing a ball.
What You Really Need to Know
At this point in my life, I could list the muscles and actions in my sleep. But for that interview question, I would probably say…
“Does the rotator cuff ever work in isolation?”
When it comes to the rotator cuff for living an active life, one that’s uninhibited by pain or weakness, the textbook answer doesn’t mean much.
Here’s what really belongs in the rotator cuff instruction guide…
The Rotator Cuff is a Stabilizer

The rotator cuff has one big job, and that is to keep the arm bone in the center of the shoulder socket.
This single photo provides a nice summary of the shoulder construction. Notice how the arm sits on a small pivot point, like a golf ball sitting on a tee.
(If you want more of this shoulder anatomy coverage then check out this blog post…Everything You Need to Know About the Shoulder)
Weakness or fatigue of the rotator cuff causes the ball to lose its position on the tee.
Here’s a great study that shows you what happens:
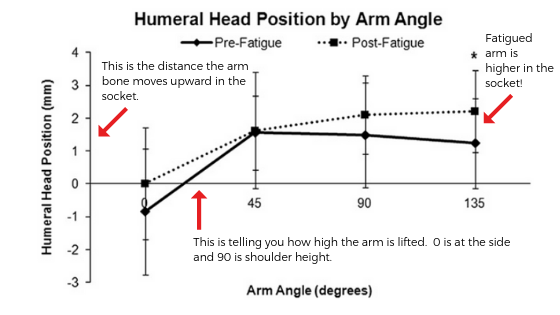
Reference: (Chopp 2010)
What you’re seeing is the position of the arm in the shoulder socket as it’s lifted overhead. The solid black line is a fresh shoulder, the dotted one is after a set of exercises to fatigue the rotator cuff.
The first point is at zero degrees, meaning the arm at the side. Even from the start, the ball is already riding a bit higher (not significantly higher though, so take that with a grain of salt.)
As the arm lifts away from the body, the ball does move upwards a bit. As the arm goes higher, when the rotator cuff is not fatigued it starts sliding down in the socket. That’s caused by the rotator cuff working to spin the ball in the socket.
But with a tired rotator cuff, the arm bone slides upwards in the socket.
This is not good, because it creates a condition called shoulder impingement. Which is the number one cause of shoulder pain.
Build Rotator Cuff Strength
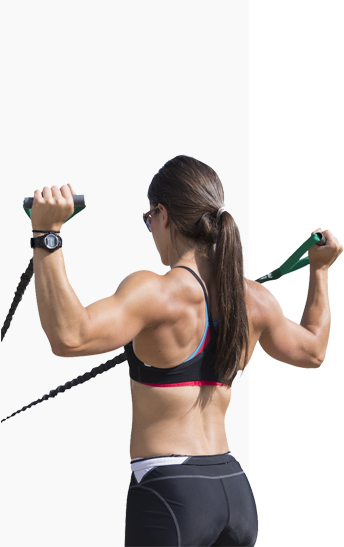
Train your rotator cuff as it’s meant to work—as part of a bigger system of movement that pushes, pulls, and carries heavy things.
There are times to isolate specific rotator cuff muscles, and that’s when you would need to know those specific actions. But that’s usually for rehab clinics, or in cases when you have a big-time weakness that needs to be addressed.
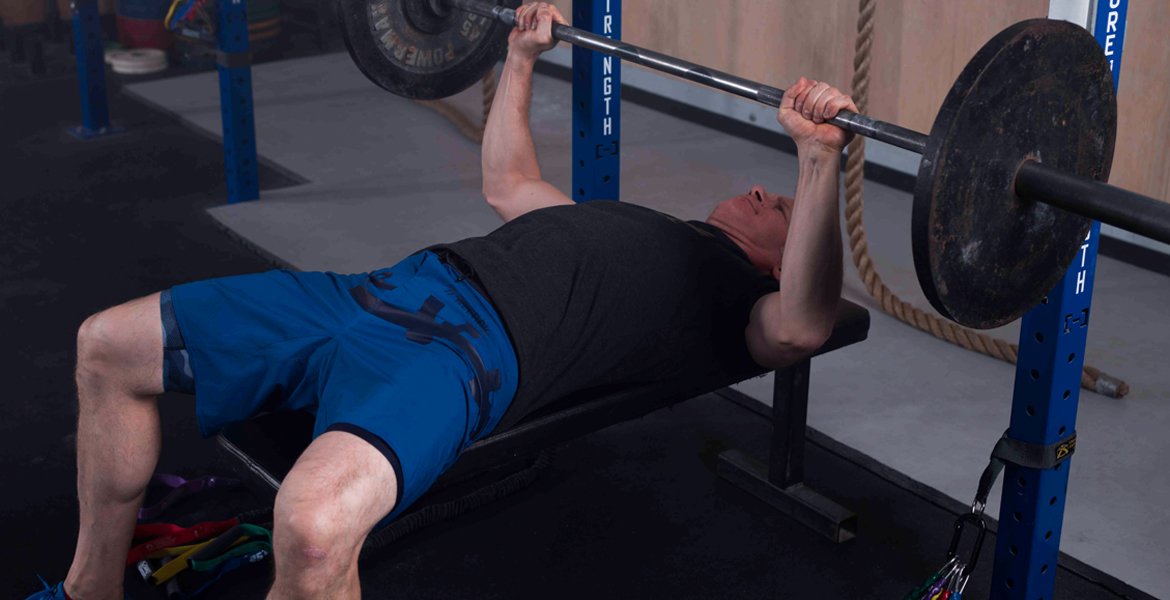
If your goal is a strong and healthy body, there’s no better way to build rotator cuff strength than as part of a progressive strengthening plan.
In a study about rotator cuff training, a strength training program of pull-ups, overhead press, rows, and push-ups did much better than simple rotator cuff exercises (ref).
Not to mention, a much more effective way to tackle your fitness goals.
But that means adjusting your training some. If you want your rotator cuff to get the full effect as well as the prime movers, do the following:
- Slow down your reps (not meaning super slow, but control the weight)
- Use a full range of motion
- Go for the free weights rather than machines
All of these things will require a decrease in weight but will help develop stability of the joint, which is essential to the strength and a lifetime of joint health.
Rotator Cuff Tuning
You may hear me saying …
Hit the weights (with balanced and progressive training program) and my cuff’s covered?
Well, not exactly…
That may get you strong, but you would also be one-dimensional.
The awesome thing about the shoulder is that is can move in a number of ways. For a complete shoulder program, it’s important to train the rotator cuff (and other shoulder muscles) to use all those movement patterns.
Which doesn’t happen with simple shoulder rotations with the arm at the side. Nor does it have to be any crazy shoulder exercise or tool either!
We’ve found that a simple progressive warm-up helps get the shoulder muscles coordinated and firing to optimize your shoulder movement.
Throw in the CS Activation program as part of your everyday warm-up routine— it’s a quick and effective way to tune up your rotator cuff.
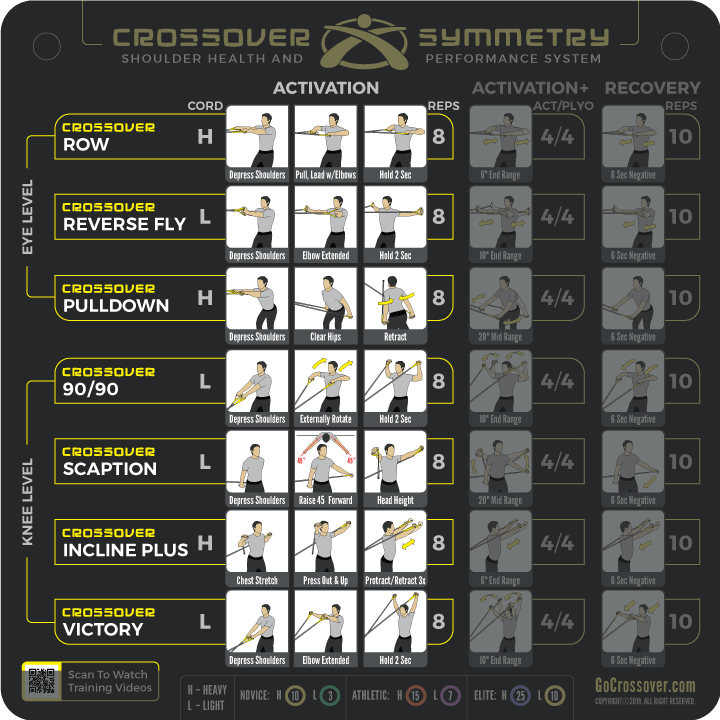
(For elite performers—we do recommend more advanced stabilization drills and plyometrics for high-performance shoulders, to take things to the next level. We offer an Activation+ for that, but we recommend everyone starts with the basic CS Activation warm-up.)
Rotator Cuff Endurance
Lastly, challenge your rotator cuff endurance on occasion. Because as you remember from the fatigue experiment above— when the rotator cuff got tired, stability decreased.
So throw in 1-2 shoulder supersets (several exercises done without rest in-between) on the tail end of your training sessions to challenge your muscular endurance a bit.
If the loads are too heavy, or your form falls apart, you’re asking for a beat-up shoulder. But that’s not to say don’t challenge yourself a bit.
The key here is to bend, but not break.
Keep the volume at a moderate level, and the weights on the lighter end.
I’m a bit biased, but cruising through the CS Strength Program once or twice, is a nice challenge to build rotator cuff strength, without overdoing it.
In Summary
You cannot build a strong shoulder without a rotator cuff to support it. But that doesn’t mean you need to isolate each specific rotator cuff muscle to push your gains.
There are far more effective ways to get it done!
To build rotator cuff strength, 80% will come from properly progressing and balancing the pushes and pulls in your strength training plan.
The rest of it will come from a daily dynamic warm-up that uses your shoulder through many planes of motion. And for good measure, throw in a shoulder burner twice a week to build muscular endurance. This will do far more to build rotator cuff strength than the typical shoulder rehab type exercises.
Hopefully, you’ve got enough info to start doing more for your rotator cuff. If you’re still unsure then pick up a Crossover Symmetry System, we’ll lay out everything you need to know about training your shoulders.
Either way, it’s time to start doing rotator cuff exercises differently. Not dinky shoulder rotations, but making decisions in your workout plan that will help improve your smaller (but very important) muscle groups, along with the big ones.
Performance
Based System
Crossover Symmetry is the smartest path to shoulder health and performance. In less than 5 minutes a day, you can prevent many injuries by enhancing the balance and function of the rotator cuff and scapular stabilizing muscles.